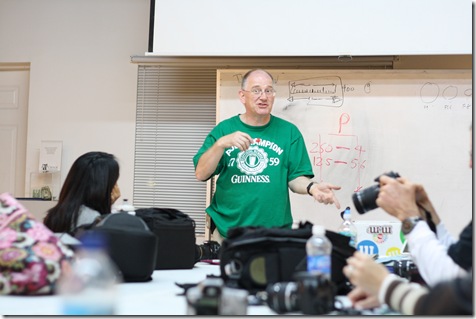
On November 13, I took a Canon Rebel 101 class and promised I would share all the details of what I had learned. So sorry it took me a MONTH to get around to my recap, but here it is!
I want to preface this post by saying I am a newbie when it comes to SLR photography! I definitely do NOT think I know everything, so if I get something wrong or miss an important point, please feel free to expand in the comments section. 🙂
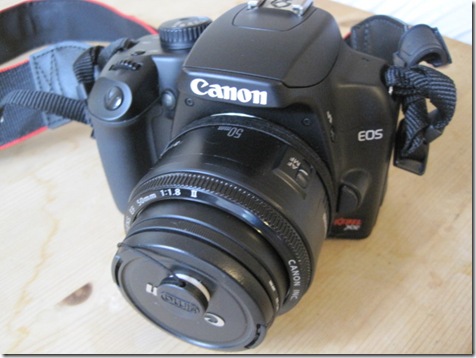
As described on my Camera page, I have a Canon Rebel XS.
Basic Definitions!
First things first. An SLR camera allows you to manually adjust (among other things) the shutter speed, aperture, and ISO.
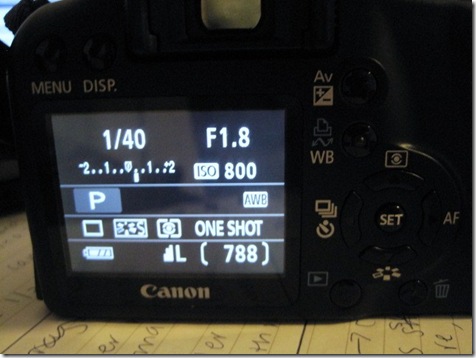
The number on the top left (i.e. 1/40 in the picture) is the shutter speed, which is basically how long the camera shutter is open (that clickity click noise you hear when you take a picture). Shutter speed is measured in seconds, so 1/40 is equal to 1/40th of a second – that’s FAST. Side note: most people can hold still for 1/30 of a second while they take a picture. If you try to use a slower shutter speed, you need a tripod or it will be fuzzy.
The number on the top right (i.e. F1.8) is the aperture, which is the size of the opening in the lens when a picture is taken. Aperture is measured in “F Stops.†The lens on my camera (which is a 50 MM F 1.8 lens) goes from F 1.8 to F 22. Large aperture (more light gets through) have smaller numbers and smaller apertures (less light gets through) have larger numbers. The aperture is important because it relates to Depth of Field (DOF). The larger the aperture (smaller numbers), the more that will be in focus in the picture – the foreground and the background, for example). The smaller the aperture (larger numbers), the less that will be in focus – like just a single French fry.
The number underneath the aperture is the ISO number. In digital photography, ISO refers to the sensitivity of the image sensor. The lower the ISO number, the less sensitive the camera is to light. Higher ISOs are better in darker situations, but there is more “noise†in the picture. My camera has the following ISOs: 100, 200, 400, 800, 1600.
What Do All Those Buttons MEAN!?
Someone once said to me, “If you only use your SLR camera on the automatic settings, you might as well use a point and shoot.†SO TRUE! The great thing about SLR cameras is that you can adjust the ISO, aperture, and shutter speed to create beautiful pictures that a P&S camera simply cannot “know†you want to take.
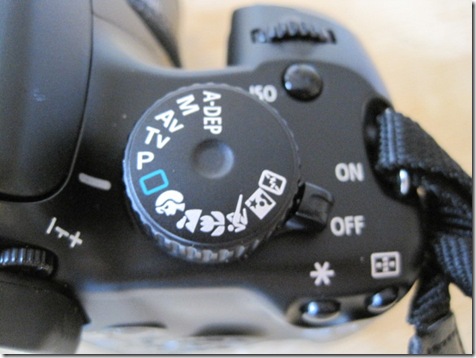
I’m only going to deal with the options above the green square button (the green square and everything below are automatic settings in which you cannot change the ISO, aperture, shutter speed, or flash).
- P Mode: The camera will automatically pick the shutter speed and the aperture. You can adjust the exposure (using the AV + or – button on the back of the camera), white balance (using the WB button on the back of the camera), and ISO (using the ISO button). I take most of my indoor food photographs in P Mode without a flash, with adjusted exposure (+ a quarter of a stop), and with adjusted white balance (on the Tungsten Light setting).
- TV Mode: In this mode, you can change the shutter speed, but the camera will choose the aperture for you. You can adjust the shutter speed by using the scrolling button on the front of the camera. If the aperture number flashes when you try to take a picture, there is not enough light coming into the camera for the camera to take a picture at that shutter speed. You can also customize ISO in this setting.
- AV Mode: The opposite of TV Mode – you can change the aperture, but the camera will choose the shutter speed.
- M Mode: You can customize everything in this mode. M stands for manual.
Some Final Tips
- The best advice I can give you is to just PLAY WITH YOUR CAMERA! Spend a few hours taking pictures of different things with different settings to see how they come out.
- When you review pictures with the playback mode, you’ll see four numbers at the top. These numbers represent the shutter speed, aperture, exposure, and the file number. If a photograph doesn’t look right, inspect these numbers to see what went wrong.
- Keep your ISO as low as possible. The higher the ISO, the more noise in the photograph.
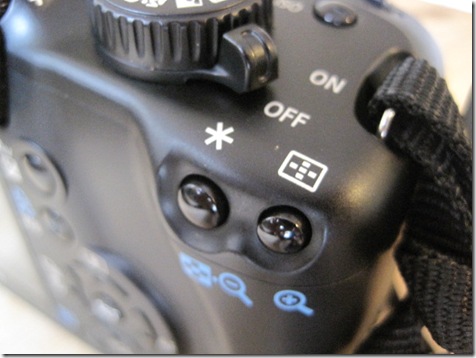
- You can select the point your camera focuses on instead of allowing it to auto focus using the star-in-a-square symbol shown on the upper right of the above photograph. Look through the lens, press this button, and use the scrolling bar to select a new focus point.
- Avoid using the flash at all costs. Food usually looks terrible with flash.
- USE YOUR SAFETY STRAP! Enough said.
I hope you enjoyed my review of my Canon Rebel 101 class! :) Although a lot of this information is specific to Canon Rebels, it can be applied to all SLR cameras. This is very introductory, and there are many neat things that SLR camera can do, so be sure to play and explore!
To learn more about my camera and lens, check out my Camera Page.
What photography tips do you have to share?

This would be fab if I actually had one! Hopefully Santa drops one off and I can come back and use these tips.