Crafty – Again

in House

The crafty, do-it-yourself craze continues in the Boyle household.  We can’t get enough of Home Depot.  Here are two small projects that we tackled over the weekend.  I love small projects that make a really, really big difference!

IMG_8302

Up first: DIY Mirror Frame.

IMG_8288

pinterest

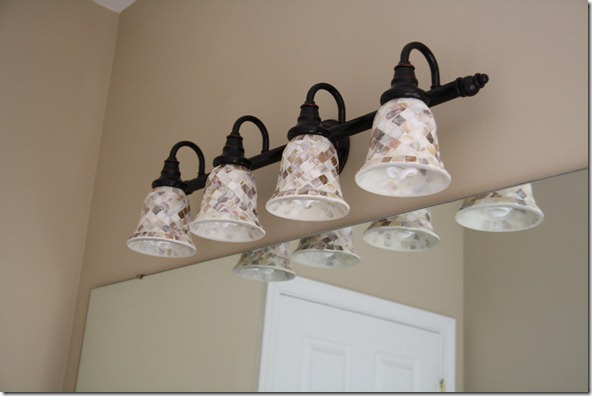
As I wrote in my last Crafty post, we’re trying to make our master bathroom less builder-grade and more fabulous.  After painting the cabinet pulls and installing a new light fixture (which we bought at Lowe’s, by the way), it was very obvious that we had to do something about the big, boring mirror.

IMG_8283

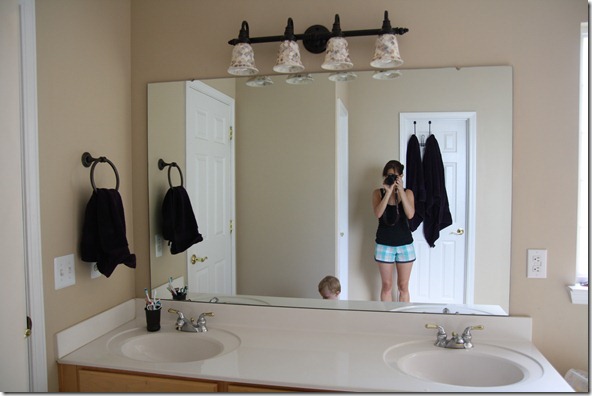
It looked seriously cheap – and it needed to be GRAND!

IMG_8284

I spy a Henry head.


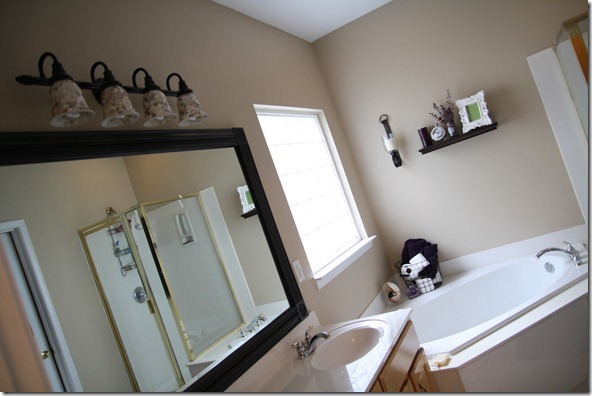
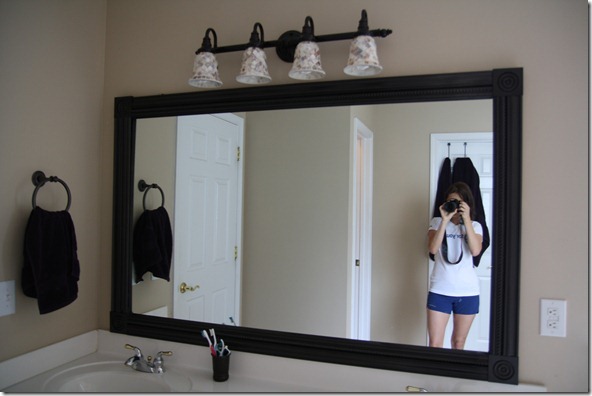
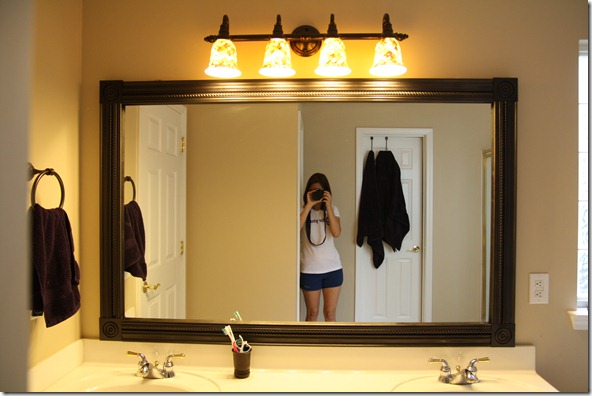
We made a mirror frame using crown molding and a little bit of spray paint.  Check out the “after” shots. It’s not perfect-perfect, but it’s close enough. I’m pretty proud of it… I think this is our best DIY project yet.

IMG_8298

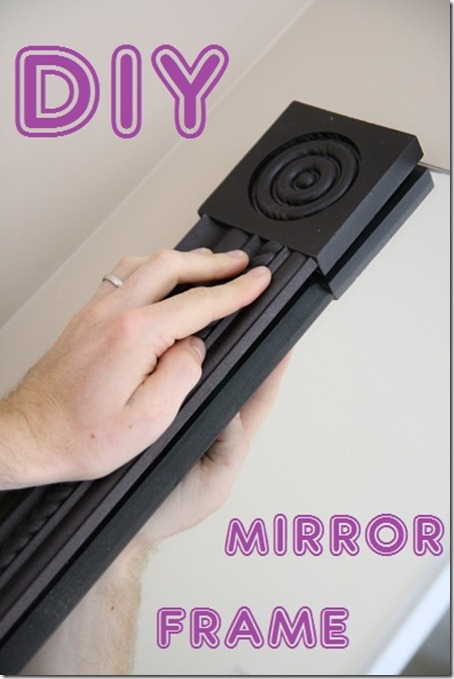
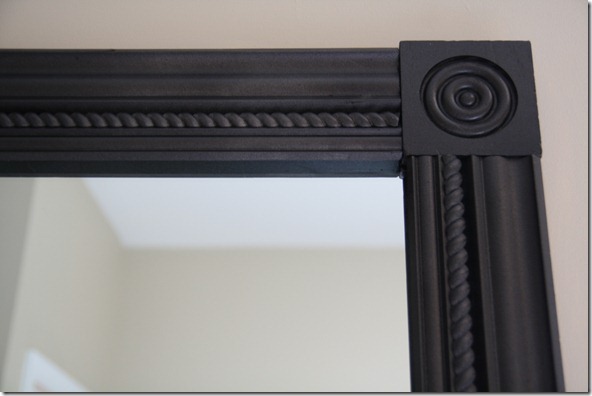
We don’t own a saw that would allow us to make 45-degree angle cuts, so we bought square pieces of molding (sold in the decorative crown molding section) to place in the corner.  See?

IMG_8299

Here’s what you’ll need to make a DIY mirror frame without a saw:


Four corner pieces of molding

4 length of molding

Spray paint

Liquid Nails

Super glue

Painter’s tape


When you buy your molding, ask the salesman at the hardware store to cut the molding for you before you leave the store (they’ll do this for free).  You’ll want to have about 1/2 inch of overhand on each side of the mirror (unless it butts up against the countertop, as ours does at the bottom). So, to figure out how long you need the molding to be for each side, measure the mirror from top to bottom and add an inch (or 1/2 an inch ).  Subtract the width of two corner pieces.  If your mirror is 60 inches long, and your corner pieces are 3 inches wide, you’ll want to cut the molding to be 60 + 1 – 3 – 3 = 55 inches.


When you get home, spray paint the front, sides, and back (very important) of each piece.

IMG_8276

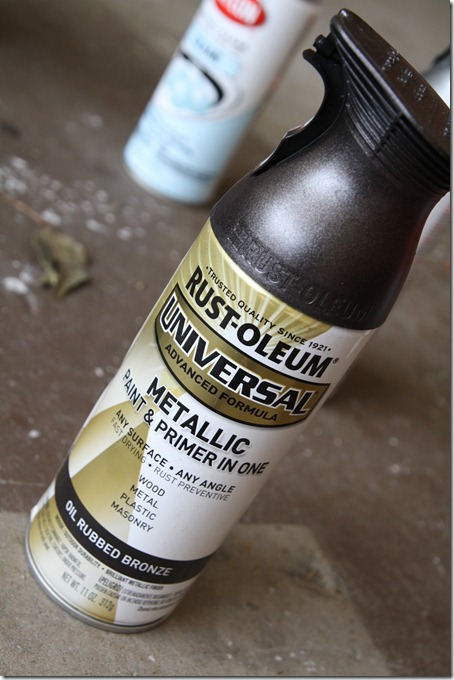
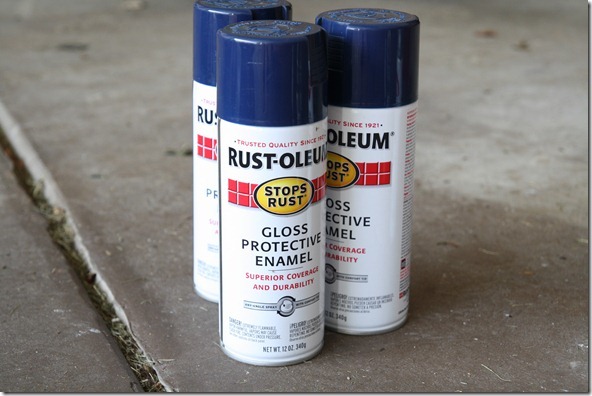
Here’s what we used (we needed two cans).  Do a double coat if necessary.  It’s important to do the backs because you can see the back of the boards in the reflection of the mirror.

IMG_8273

Once everything is dry, it’s time to affix it to the mirror.  We used a combination of Liquid Nails and Super Glue (the Super Glue was necessary because the molding was curved in a few spots, and it helped really hold it down).  In hindsight, I wish we had used clear Liquid Nails, as if the goo gets too close to the edge, you can see it through the sides of the mirror.  And you may want to use painter’s tape to help hold the boards in place as the glue really, really sets.


Oh, if you have those bulky mirror clips, which we do not, you may want to carve out a bit of the back of the boards to allow the board to lay flat against the mirror.  Just be sure to spray paint it once you’ve cut the divot out.

IMG_8297

This was a really simple project and so easy to do!  It only took a few hours, very little work, and – as mentioned – no at-home power tools.  Oh, and one more thing – you may want to help fill in the gaps between the molding and the corner pieces with wood putty (which you could then either tape off around and spray paint, or spray onto a piece of paper and use a small brush to touch up).


Pretty, right? It makes such a difference!


Up next…

IMG_8293

pinterest

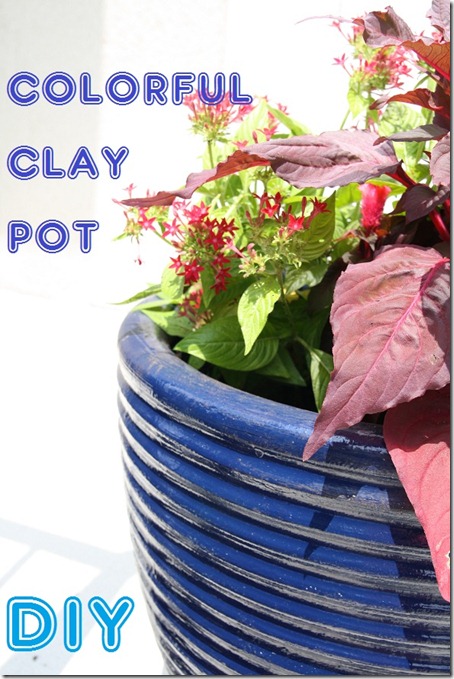
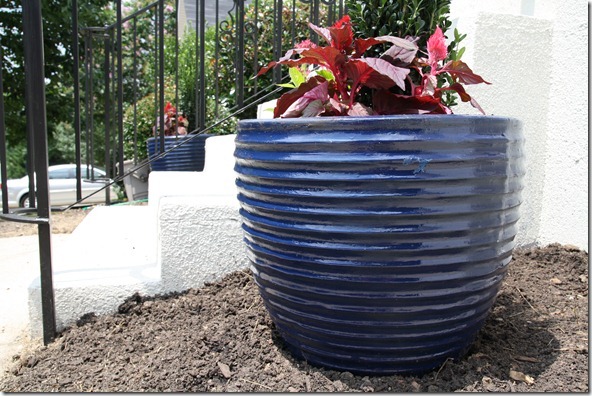
Our front stoop was seriously lacking in color and visual interest.  I wanted to buy a bunch of those huge, decorative blue pots that you sometimes see at Home Goods or Home Depot… but they are so expensive!  Plus, I could never find a bunch in the right color.


So we made our own!

IMG_8289

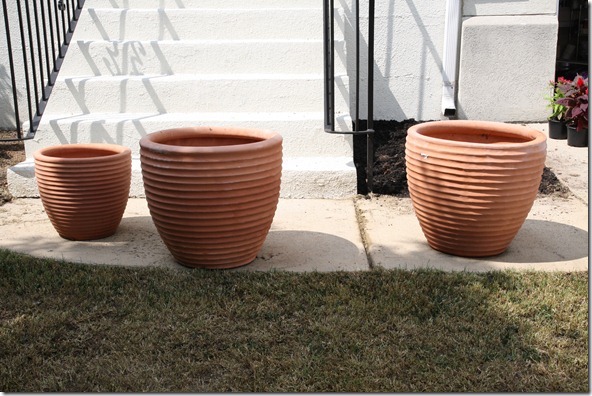
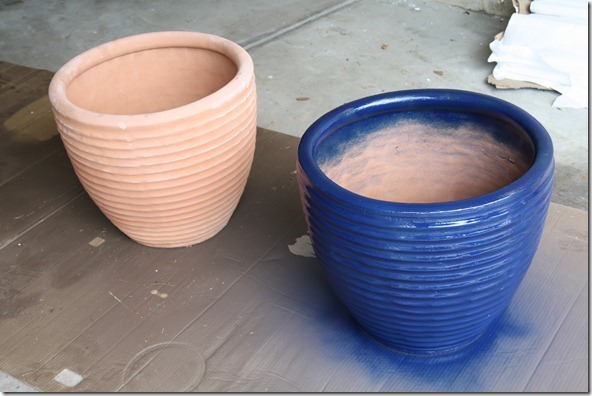
We bought three clay pots (the largest were 20 inches in diameter) from Home Depot.

IMG_8269

And I got to sprayin’.  Every time I spray paint, I think of Young House Love saying, “If you’re a’sprayin, your arms should be a a’swayin.”

IMG_8272

You don’t need to spray the inside of the pots, but you do want to go down a few inches.  Of course, it’s worth noting that spray painting the clay pots seals them.  So be sure that your pot as a hole in the bottom for water to escape.

IMG_8278

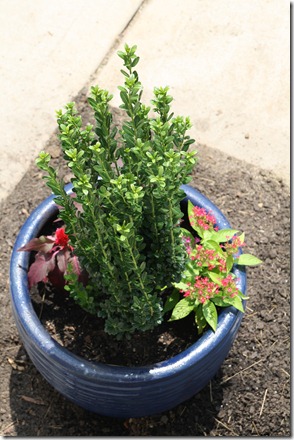
Once the pots were dry, I dragged them into position and filled them.  We planted some flowers and greenery, as well as a Sky Pencil, which will hopefully grow as tall as 10 feet.

IMG_8295 IMG_8290

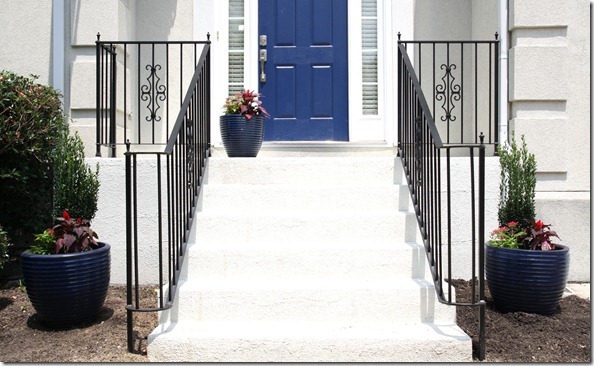
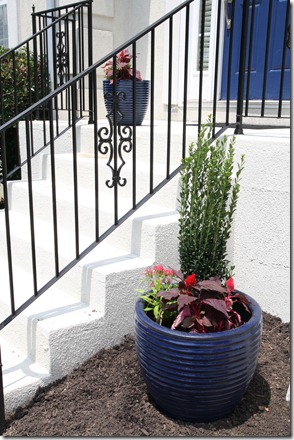
I love it!  I especially like how it looks expensive but wasn’t.


I painted our door blue the second or third we owned the house, and I love how the pots tie in the color.  We have some more landscaping to do out front, but this is a nice start.

IMG_8292

Two easy projects, a big change, and not a lot of cash.  The DIY mirror project cost us about $100, and the pots and plants were closer to $150.


How’s everyone’s DIY projects coming along?  It feels so good to complete a few!

{ 74 comments }


  • Tricia August 6, 2013, 10:11 am

    I love, love, love both. I’m dying to paint our front door but I can’t settle on a color. I’m a little more bold than my husband haha

    • Caitlin August 6, 2013, 10:12 am

      ME TOO! I had to convince the husband to let me do the dining room purple and the front door blue. 🙂

      • Julie August 6, 2013, 10:48 am

        Oh your purple dining room is my fave!! I have serious dining room envy! The front door looks great, too!

  • Kristy @ Kristy's Health Revolution August 6, 2013, 10:12 am

    I love both projects so much! The frame really does make a huge difference in the bathroom.

  • Emily @ The Good Era August 6, 2013, 10:14 am

    Wow, you’re right, the mirror makes such a difference!! It looks so nice with the new light fixture too.

    The pots are a great idea. I never would have thought to just paint them yourself. Oh what a little spray paint can do 🙂

  • Colleen August 6, 2013, 10:17 am

    Love it! We are going to do the same thing with our large mirror once we redo the bathroom.

  • Ashley @ My Food N Fitness Diaries August 6, 2013, 10:18 am

    LOVE it! You’re right, the little things definitely make a huge difference. We recently bought a new shower curtain for our guest bathroom, and it looks SO much better just because of that.

  • Ashley @ Saving Money in your Twenties August 6, 2013, 10:23 am

    Whoa, awesome job on both those projects! When I (one day) get out of a rental, I’d love to do that mirror frame idea. Super easy but makes a huge difference. And spray painting the pots is so much better than buying the fancy colored pots- thank you for the tip!

  • Christy August 6, 2013, 10:27 am

    Looks fantastic! You have inspired me to finally do our mirror too! I also bought that Rustoleum Oil Rubbed Bronze paint and painted all of our light switch plates and doorknobs. They looks so much more classy and it was so cheap! 🙂

    • Tricia August 6, 2013, 4:27 pm

      Omg I never thought to do that!! I have the ugly gold knobs and white switch plates in my house. Genius!

    • ali August 7, 2013, 9:14 am

      How are your doorknobs holding up? I wanted to do this with ours but I worry the paint would chip off after awhile.

  • Ashley N. August 6, 2013, 10:32 am

    I LOVE your front door! The plants look so welcoming to your home. Also love the mirror! It really is the little things when it comes to home decor.

  • Priyanka August 6, 2013, 10:46 am

    I am in serious DIY mode these days, I have started by decorating my son’s bedroom and doing simple DIY projects.

    Love, love your front door.I had seen one done in turquoise on the Cousins on Call show and knew I would do something similar. This one’s another good inspiration.

  • Julie August 6, 2013, 10:49 am

    Both projects look great! Wow!

  • Heathers Looking Glass August 6, 2013, 10:54 am

    I have been wanting to frame our mirrors for a LONG time but I’m stuck b/c our vanities are in an “L” shape so the mirror goes to the corner then the next wall over with a piece down the middle to connect them and I’m not sure how it would work. Sad times.

  • Wendy August 6, 2013, 11:31 am

    I love the ideas and output from both of your projects! Great job. I have a question – where do you get the inspiration and directions for your DIY projects? Do you follow particular websites or watch shows on cable? I would love to do DIY projects but don’t have the first clue about where to look (and I am not handy by nature, so I need help).

    • Caitlin August 6, 2013, 12:56 pm

      Pinterest! Gotta get on there!

  • Lauren @ The Highlands Life August 6, 2013, 11:36 am

    We have a mirror in our bathroom like that too that needs an upgrade. Glad you posted this!

  • Julie @ RDelicious Kitchen August 6, 2013, 11:40 am

    looks great! i have a lot of DYI ideas, but I just need to find the time

  • Genna August 6, 2013, 11:48 am

    I love these home projects! I am looking to buy my first house and these are giving me such great ideas! Thanks!

  • Andrea August 6, 2013, 12:09 pm

    I’ve had this mirror project on my “to-do” list for both of our bathrooms for awhile and have pinned countless variations of how to do it! Just wondering what the sides look like? Can you see the edge of the mirror underneath the wood or did you cover that up somehow?

    • Caitlin August 6, 2013, 12:56 pm

      You can see it, but not a lot, because of the overhang. You could always add a strip of wood to the sides.

  • Sara @ LovingOnTheRun August 6, 2013, 12:15 pm

    The mirror looks GREAT!! I wish I was that crafty or had the ability to be able to do things like that in our townhouse- one day we can when we buy! Great job!!

  • Miranda @ Miranda Runs August 6, 2013, 12:16 pm

    I made my own chalkboard and was feeling pretty dang good about that 🙂

  • Jolene (www.everydayfoodie.ca) August 6, 2013, 12:46 pm

    That frame makes a HUGE difference! It looks awesome – you did a great job Caitlin! Now you should probably fly to Saskatchewan and work on some DIY projects in my home 🙂 I’ll feed you gourmet food 😉

  • Caroline August 6, 2013, 12:48 pm

    I love your front door! Do you remember what the name of the color is? We’ve been thinking about painting ours and that color is perfect!

    • Caitlin August 6, 2013, 12:55 pm

      I’ll check the garage and see if we still have the paint!

  • emily August 6, 2013, 12:52 pm

    Those both turned out great! I am way too klutzy/nervous to do much DIYing.

  • Taylor August 6, 2013, 1:31 pm

    I love how simple these changes were and how big of an impact they made! Kind of like the definition of an HTP, right? 🙂

    The mirror and pots look great! Love the blue.

  • Kim August 6, 2013, 2:38 pm

    I love the pots and I love how well they go with your front door! I’ll have to remember that one once my husband are all settled into our new place!

  • Alex @ Kenzie Life August 6, 2013, 5:18 pm

    Oh wow, I love that mirror!! I still live in an apartment so I can’t make any big changes, but when I get my own house I want a mirror like that! Nicely done!

  • Katie @ Talk Less, Say More August 6, 2013, 9:31 pm

    Awesome!! I’ve been on a big DIY kick lately too, refinishing old dressers my parents had in their garage. I’ve done one of the two and they look AMAZING so far!

  • 911shazza August 7, 2013, 4:25 am

    Wow, this looks fantastic!! Kind of making me feel inspired!! Might have to do something crafty like this in our bathroom!! Great idea!!

  • Caitlin August 7, 2013, 8:53 am

    Looks so good!!! I’m always amazed at how little changes, like paint, make such an enormous difference.

  • ali August 7, 2013, 9:17 am

    I wanted to add a frame to my bathroom mirrors which are the same as what you have (I think our houses were built around the same time – same gold fixtures everywhere, same mirrors, etc.), but I was concerned that the lights in the bathroom (similar to yours but a tan frosted glass – much nicer than it sounds, hah), hang down close to the actual mirror and I thought it might look weird with a frame too close to the lights. BUT, it doesn’t! My mirrors are starting to show wear at the bottoms as well so this would be a great coverup. I may be doing this this weekend! Thanks for the tips! 🙂

  • Reenie August 7, 2013, 12:59 pm

    Looks great ~ love the pots with the color of your door. I’m a spray-paintin’ Queen. HA!! Nothing is safe around me. 😉

  • Christina August 7, 2013, 1:35 pm

    Great job!Kudos to you for knocking something of the good old DIY list!
    I have been working on slowly spray painting all of our door knobs and replacing the hinges and strike plates throughout the entire house to get rid of all the icky gold. We also are using ORB what a difference that makes!

  • joelle (on a pink typewriter) August 8, 2013, 12:34 pm

    I need to do more DIY type projects! I feel like it would save me so much money (and time pouring over Etsy…).

  • Lauren @ Peaks and Passports August 12, 2013, 11:15 am

    DIY totally intimidates me as I’m not crafty at ALL, but these projects actually seem doable, even by me! Thanks for sharing!

  • Jodi September 2, 2013, 7:34 am

    I did this project yesterday. It cost less than $50 and was so easy!!

  • judi Zickefoose November 6, 2013, 2:53 am

    In the middle of the bathroom upgrade, on our way to Home Depot, and trying to figure out how to attach the new DIY frame to the ugly, plain mirror. Your site was just what we needed. Easy to understand! And your before picture looks just like our mirror, except no clearance at the top.

    And I kept reading about the pots. I really enjoyed your blog because you never assume that me, the reader, is an avid DIYer. I am not! THANKS!

    So, yeah. REALLY Enjoyed your blog!

    • Caitlin November 6, 2013, 9:22 am

      thanks 🙂

  • Kathie November 14, 2013, 12:49 am

    You are so awesome to post this, thank you! I have wanted to do this in our bathrooms as well, but every blog post with instructions includes using a saw and I don’t have one. I think yours is the best looking one I’ve seen anyway 🙂 Thanks for sharing (found your post via Pinterest!)

  • positive-chris December 11, 2013, 8:16 pm

    I am doing the mirror project on a mirror that I am hanging in my living area. The mirror was so plain and I was looking for some drama to add to it. The frame you showed is the perfect thing 😀

  • D January 25, 2014, 11:56 pm

    I live your mirror idea….. very creative of you. I do however have an issue of the three different finishes. chrome faucets, gold shower door frame and the dark wood and light fixture. It would drive me crazy. You might want to paint you shower door frame…… they are paintable with rustoleum ……..

  • Lisa January 28, 2014, 9:19 pm

    Love this mirror! Totally get the no power tools thing so this is perfect! Question….what did you do with clips on the mirrors? Does the moulding just go over it?
    Thanks!!

    • Caitlin January 29, 2014, 6:56 am

      Our clips were flat so we could just go over them. You may need to create a divet otherwise.

  • Marcella March 7, 2014, 9:22 am

    Super Super nice. I will give another life to my mirrors. Thank you for sharing !!!

  • Stacy April 25, 2014, 11:00 pm

    Mirror framing… up next!! Looks amazing!

  • Kim May 14, 2014, 7:11 am

    I have the mirror project on my to do list, but now wondering what you mean by “not perfect, perfect”?? I would appreciate you sharing so I am not disappointed with the DIY at my house!,

    • Caitlin May 14, 2014, 8:39 am

      The interior part of the mirror isn’t exactly flush against the wall. I would buy boards that go flush against the mirror. Does that make sense? Also, use some sort of CLEAR liquid nails. Those the mistakes that I made!

  • Wanda August 5, 2014, 1:50 pm

    Just what I was looking for to frame out a mirror

  • Amber September 12, 2014, 11:47 pm

    I love the framed mirror! Beautiful work and cant wait
    to do this. I have the same exact mirror in my
    Master bath. Its so ugly! lol The bathroom has two seperate large vanities so I’ll have to
    do two big mirrors, but it will make a huge different! Thank you!

  • Luticia Cortez September 24, 2014, 5:19 pm

    Love the mirror makeover! Just wondering how you hung it to the wall?

  • Daniel October 14, 2014, 8:10 pm

    how much did it endup costing?

  • gayle October 18, 2014, 5:08 pm

    I redid my bathroom mirror like this. Looks amazing, totally new and cost about $15. And very easy to do!

  • Kim December 31, 2014, 9:11 am

    Thank you so much for your tips! I painted my mirror and framed it! Looks beautiful thanks to you!

  • Suzanne Phillips January 4, 2015, 10:29 am

    I love this, but have a couple of questions. Did you use corner pieces on bottom? Why only subtract for 2 if you used 4? and my mirror is almost flush with a medicine cabinet can this still be done?
    Thank you

  • Dee Peterson February 1, 2015, 3:28 pm

    Hi, I love your mirror frame project. My question is.. how did you put the molding up over the Mirror clips? I have the SAME type of mirror over the same size Vanity. I want to do the Framing like you showed, with the crown mold squares and trim. How were you able to mount the framing piece over the mirror clips so that the molding stays in place? My thought would me to line up and dig out the back of the mold or cut it out to fit, but was wondering how you were able to set it over the molding. The less digging on the trim the better in my book. Thanks for your time!

  • Brittany March 19, 2015, 11:58 am

    I love the mirror and REALLY want to upgrade my new house with it–my question is: did you glue the molding directly onto the mirror? It looks like you did, and the mirror in my master bath goes all the way to each wall, so I’d have to cut the mirror if you don’t glue it directly onto the mirror. Thanks.

    • Caitlin March 19, 2015, 8:51 pm

      Yup!

  • Angia April 17, 2015, 8:12 am

    I love your DIY projects. I especially love the molding you did on the mirror.
    I too have a builders grade mirror and have been wanting to do a molding on, but was too afraid. Now I will do it. I also like the flower pots you spray paint and that you painted the front door. You have inspired me. Thank you.

  • Amanda April 26, 2015, 9:16 pm

    I looooove the mirror frame!

    How has it held up over time? You’ve inspired me to do this but I want to make sure steamy showers won’t do anything to the liquid nails/super glue combination as the years pass.

    Thanks!

    • Caitlin April 27, 2015, 11:41 am

      It has held up great! No changes from when I put it in.

  • Kristina Willis December 23, 2015, 10:27 am

    Did you glue the molding to the mirror or to the wall? Or a little of both?

  • Leanne December 27, 2015, 10:35 am

    Love the frame ! Silly question .. Did you attach the moulding right on the mirror with the nails? Trying to figure out how to assemble it is confusing me!

    Any tips or clarification would be greatly appreciated.

Previous post:

Next post:

Healthy Tipping Point